In the Kitchen

In the Kitchen, Product

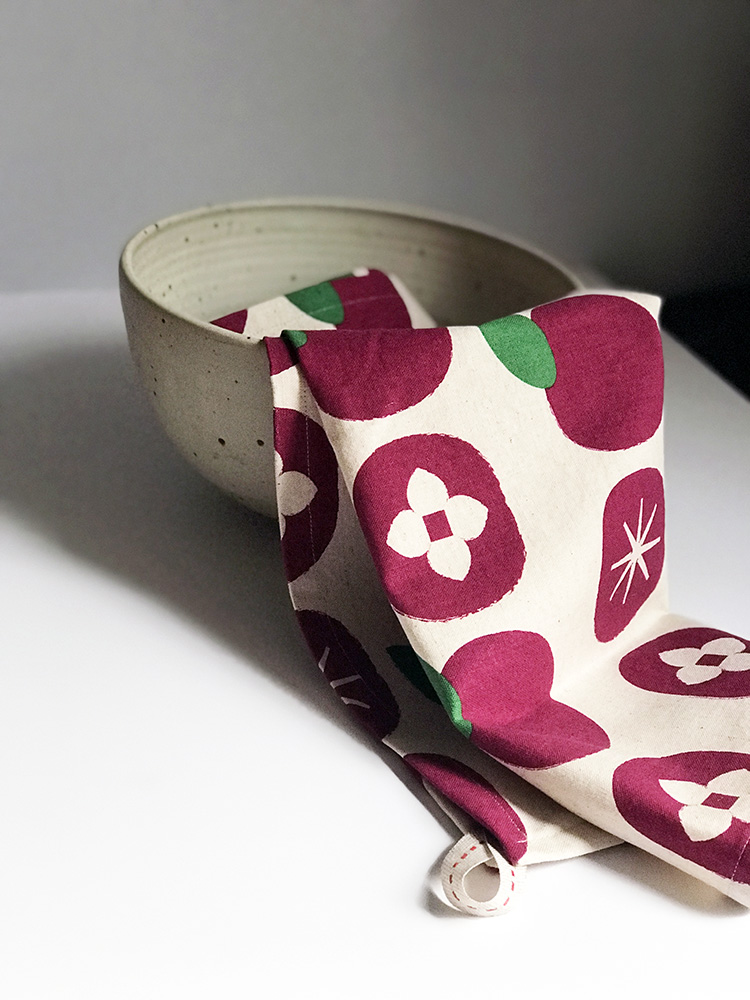
Tea Towel vs. Dish Towel

When I work at markets, which is a few times a year, many people ask what a tea towel is and what's the difference between a tea towel and a dish towel.  I usually respond with that a tea towel comes from the British tea time and it's a bit nicer way of saying dish towel .  Some believe that the quality of the towel is what distinguishes it.  Some towels are terry cotton (like a bath towel, a looped weave), flat cotton, linen or linen cotton. 

I found a very interesting article on Huffington Post.  It is  a few years old but still relevant. The author is Jessica Cumberbatch Anderson and she spoke with the American Textile Museum. 

Click here to read

I love the many historical reasons she discovered.  Tea towels are one of my main staples in the kitchen and in my Etsy Shop.  I find them to be totally utilitarian, a great gift when visiting friends for dinner or a longer period and a great gift to get people when traveling.  Are you as big a fan as me with tea towels?

Tracey

Baking, In the Kitchen

The Best Granola

I know there are numerous recipes out there for granola. And a zillion choices to buy at the store but there is something special about making your own.  First it's super easy, two it's not that expensive to do, three you can do it with kids, four you know what you are putting into it, five filling your kitchen with a sweet and toasted seed smell is the best.

I've been experimenting with different recipes and this one I think may be the best. And coincidentally it is called the Best Granola. I think the secret ingredient which is not so secret, is the salt.  I also like the fact that you can mix it up and use what you have on hand.  Or don't have. 

The Kitchn has quite a number of granola recipes.  But this is my favorite. Click here to visit their website. 

Makes about 6 cups granola


Ingredients

3 cups old-fashioned rolled oats
2 to 2 1/2 cups your choice of nuts and seeds*
1 1/2 teaspoons kosher salt
1/4 teaspoon cinnamon
1/2 teaspoon cardamom
1/2 cup oil, such as olive oil
1/2 cup + 1 tablespoon liquid sweetener, such as honey or maple syrup
3/4 teaspoon vanilla
3/4 cups dried fruits, chopped

Note: Nuts that are already roasted should go in at the end after the granola is baked so as not to burn.

Equipment

Mixing bowls
Measuring cups and spoons
Spatula
Parchment
Half-sheet pan or baking shee

Instructions

1. Set out your ingredients: For this particular run of granola we are using: 3 cups old-fashioned oats, 1/2 cup pumpkin seeds, 1/2 cup sesame seeds, 1/2 cup almonds, 1/2 cup wide-flake, unsweetened coconut (added near the end of baking), 1 1/2 teaspoon kosher salt, 1/4 teaspoon cinnamon, 1/2 teaspoon cardamom, 3/4 teaspoon vanilla extract, 1/2 cup olive oil, 1/2 cup + 1 tablespoon maple syrup, 3/4 cup dried cherries, chopped (added at the end), 1 cup roasted pistachios, chopped (added at the end)

2. Preheat oven and mix dry ingredients: Preheat the oven to 350°F. Mix the oats and any untoasted nuts or seeds together in a large bowl. Stir to combine.

3. Mix in the spices: Add salt, cinnamon, and cardamom and stir thoroughly to combine.

4. Stir in the liquids: Stir in the oil, sweetener, and vanilla.

5. Bake the granola: Turn the granola out onto a parchment-lined half-sheet pan and bake for about 40 minutes, or until the mixture is light brown and toasty.

6. Stir the granola: Stir every 15 minutes or so for an even color and to make sure the granola is cooking evenly. (If using coconut, add in the last 15 minutes of baking.)

7. Prepare any late-addition ingredients: Roughly chop any dried fruits and roasted nuts being added after baking.

8. Stir in late-addition ingredients: Remove from the oven and add the chopped dried fruits and any roasted nuts at this time. Stir to combine.

9. Let the granola cool: Let cool before enjoying. The granola will continue cooking just a bit in the cooling process — it will firm up/dry out, so if it seems a little too wet don't worry.

10. Store the granola: Store in an airtight container and it should stay fresh for 7 to 10 days. For longer shelf life, store in the refrigerator.

Additional Notes:

1. Want Clumpy Granola? The key to getting chunkier granola is not to mix the granola as it's baking. Pat the wet mixture down into the baking sheet with the back of a spatula and don't mix it or disturb it while baking. Then, after cooking, you can remove it from the pan in granola chunks and store as indicated above.

2. Nuts and Fruits: I love working with sliced almonds, pecans, walnuts, pistachios, hazelnuts and sesame seeds. As for fruits, dried cranberries, cherries, apricots, raisins and currents are all great choices. Experiment with different combinations to find your favorite!

3. Consider Your Oats: Make sure to use old-fashioned oats for your granola, not quick-cooking oats. quick-cooking oats are less substantial and will cook differently and result in an almost dusty granola texture.

4. Bulk Spices: When buying spices for your granola, buy in bulk! It's almost always the freshest.

5. Mixing Techniques: While granola is absolutely a one-bowl affair, you want to mix all of your dry ingredients together before adding your wet ingredients so as to avoid clumping of salts and spices.

6. Don't Fear the Salt! Salt enhances the flavor of your granola — most people don't use enough of it! Use it.

7. Experiment with Savory Additions: I use olive oil for my granola which gives it a special toastiness. I also love using cacao nibs and a little extra salt, all of which result in an almost savory granola. Explore that savory edge!

I copied and pasted their recipe.  However the photos are all mine.  I have made this many times and make it different each time.  Enjoy! 

My favorite way to eat granola, fruit and yogurt combo!

Easy to take on the go using a mason jar. 

In the Kitchen

Favorite Winter Soups

One of my favorite parts of winter is the soup.  I love to make soup possibly more than eating it.  A few winters past I added a slow cooker to my utensil collection.  I haven't used it much this winter.  I want to, but I keep finding soup recipes that call for your basic soup pot and blender.  I do have a Le Crueset that I love.  That is my go to now whenever I am cooking soups or pastas.  

I wanted to share some of my favorite soups this season.  Along with my new favorite and go to cook book, Small Victories by Julia Turshen.  And one of the bonuses of this book, also the title, are the little victories she includes with each recipe.  Don't have a complete recipe, she may give you a substitute. 

Every recipe I have tried so far has been a total success with myself andy family.  The chicken soup is a classic and perfect for a winter's day.

My next favorite soup recipe this season is another chicken soup but this one has dumplings it.  I just love the dumplings and they are super easy to make.  This recipe comes from the Whole Foods Cookbook.  

My third and final recipe is also from Whole Foods. This is the Butternut Squash Puree.  Last night I was trying to use what we have in the fridge.  I purchased a pre cut pound of butternut squash that afternoon so this was perfect.  I recipe calls for 2 pounds so I did the math. It was rather quick to cook and then pureed it.   They also add a little tip to add cinnamon raison croutons, which I also had on hand!  My one little mistake was I think I added a little too much ginger.  So proceed with caution!

butternut squash before the puree. 

Let me know what you think if you try any of the above recipes.  Or do you have a go to for this winter?

Tracey

In the Kitchen

In the Kitchen: Gazpacho 1,2,3 - #2

Gazpacho recipe #2.  This is the second recipe I found on Food52 and it's definitely a bit more garlicky than the first. This time I tried to follow the recipe as close as possible.  One exception, I thought I had fresh dill in the garden but didn't so needed to replace that with dry dill.  And once again trying to use up the veggies in the fridge, I added a green pepper. Let me know what you think if you try this one.

Rainbow Gazpacho. I do love the name and it truly looks like a rainbow when you start to mix the ingredients together. To get the recipe click here. A couple little notes while I was making this are below each picture.  

recipe calls for 4 cloves. I used 3 large ones, this was plenty for my taste buds.

the recipe did not mention taking the skins of the cucumbers off so I peeled some of the cucumber and scooped out the seeds with a spoon, sometimes by hand.

I cored and cut the tomatoes into chunks.

Something I added that was not in the recipe were croutons.  I broiled 2 small hearty rolls, one was wheat and the other a kalamata olive roll.  Both from my local Whole Foods.  I ripped these up into bite size pieces, drizzled olive oil and a little bit of grated parmesan.  These are great to also bag up for future use.  In each serving of soup I added about 4 to 5 bits.  Love the texture this adds.  Enjoy!

If you try this recipe please let me know what you think.

Tracey

In the Kitchen

In the Kitchen: Gazpacho 1,2,3

We are nearing the end of the summer and the heat in Brooklyn has been sweltering. Something like stepping into a walk-in oven, if such a thing existed.  The last thing I want to do is turn my oven on to make a meal.  Cold soups are a cooling, refreshing meal. Simple to make and with vegetables at their ripest what better time to make some gazpacho.

I try to use up what I have from my CSA (community supported agriculture) and try not to buy anything new so sometimes I do skip an ingredient.  Below is the gazpacho recipe I found last year on Food52.  

  • 4 good-sized heirloom tomatoes, cored and cut into large chunks
  • 1 yellow bell pepper, cored, seeded and cut into large chunks
  • 1 orange bell pepper, cored, seeded and cut into large chunks
  • 1 large red onion, peeled and cut into large chunks
  • 1 English cucumber, seeded and cut into large chunks
  • 4 cloves of garlic, peeled
  • 1/2 cup fresh dill
  • one 46 ounces bottle of low-salt vegetable juice, such as low-salt V8 or low-salt 365 "Vital Veggie"
  • 1/4cup best quality olive oil
  • 1/4 cup apple cider vinegar
  • Juice of one Meyer lemon (or any lemon)

The ingredients I did not use are the 46 ounces of vegetable juice,  I replaced red onion with white onion and 2 small scallions and also added some small heirloom tomatoes from my garden. Also replaced the yellow pepper with a green pepper.  Ingredients I added because I've been seeing Gazpacho recipes this past season with watermelon so I added a few cubes.  

I really liked it, my father who tried it, didn't think it had enough oomph as he said.  He likes spice. So I added 3 pickled jalapeño slices that he had in the refrigerator and half a large sweet pepper.  We will see if that makes a difference. 

Check back soon, with Gazpacho #2. 

Enjoy!